
Onimusha: Way of the Sword All Bosses Guide: Ranked Tier
Boss guide for Onimusha: Way of the Sword covering every named encounter we can cite, the confirmed combat loop, the Carnage difficulty unlock, and the Bishamonten Sword reward.
Citable bosses: Sasaki Ganryu, Benkei, Dokyo, Byakue at Kiyomizu-dera Temple, Genma siblings Ifuu and Burai. Each: parry or perfect-dodge, punish with Issen, then Break Issen on the stagger. Carnage unlocks only after first completion, awarding the Bishamonten Sword.
Quick answer: the fights, and the systems that decide them
Direct answer: The confirmed loop does not change between bosses: read the attack, then parry or perfect-dodge, then punish with Issen, then drain stamina with deflections, then finish with Break Issen on the stagger. What changes at the endgame is how little room you get to read, and how many mechanics you are expected to have unlocked, not the fundamentals. If a fight feels impossible, the usual causes are missing Chain Issen and never using Oni Awakening, rather than a lack of raw damage.
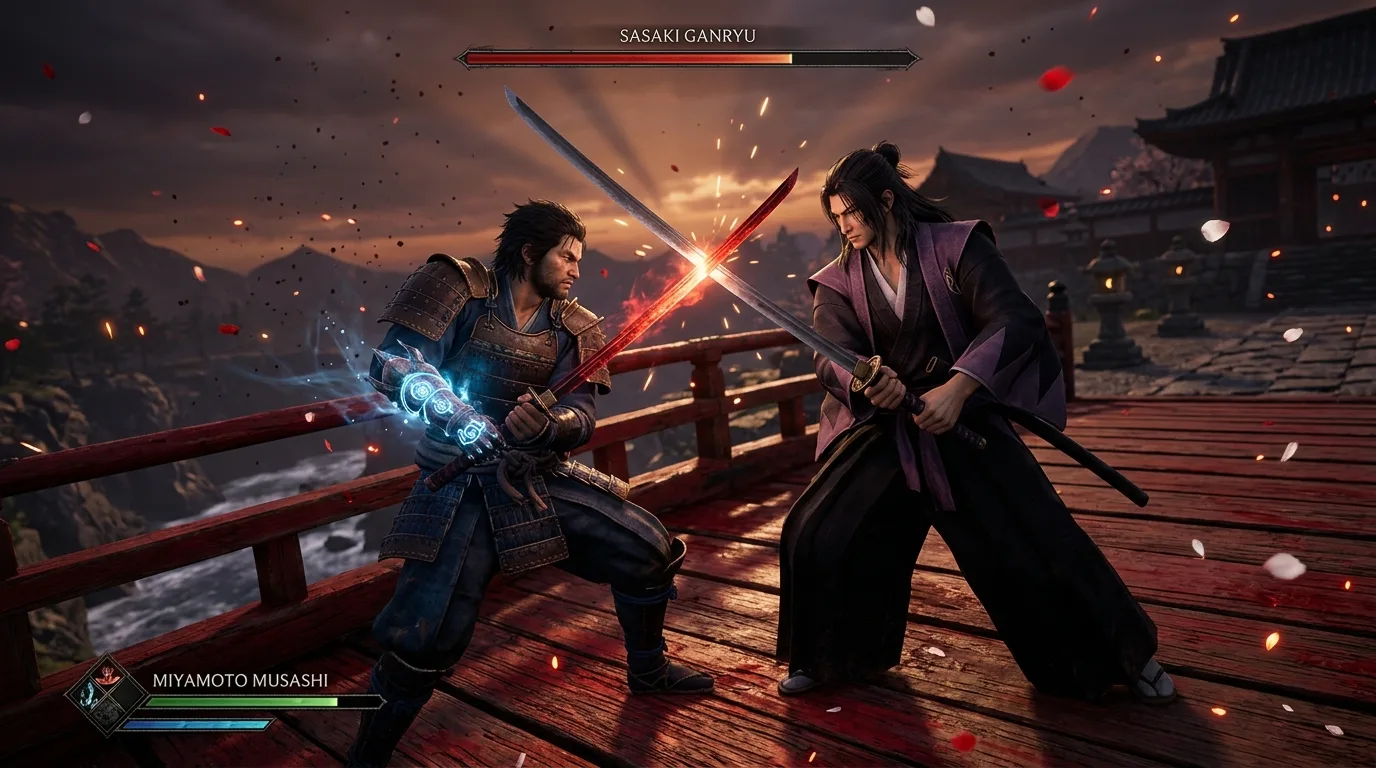
Tactical Drill: Practicing counter timings is essential for late-game duels like Sasaki Ganryu. Drill the parry window and Chain counters with our interactive Issen Timing & Chain Guide.
Named encounters we can actually cite
CAPCOM has never published a full boss roster for Onimusha: Way of the Sword. The table below lists only what is either named in CAPCOM’s own materials or named by the game’s achievement system, with the exact source column you can trace.
| Encounter | Where it is confirmed | Global unlock rate | How players meet it |
|---|---|---|---|
| Sasaki Ganryu | CAPCOM demo and trailer materials (featured rival duel) | not an achievement tier | The pure timing duel; the best place to drill the Issen loop |
| Benkei | Achievement Benkei: Out, but Not Down plus Baited by Benkei | 68.7% / 51.7% | Story encounter with a follow-up achievement for a less obvious approach |
| Dokyo | Achievement Dokyo’s Fixation | 73.1% | Story encounter built around barrier and projectile pressure |
| The Byakue at Kiyomizu-dera Temple | Achievement Serves You Right (defeat the Byakue) | 62.8% | Location-bound: the Kiyomizu-dera Temple fight |
| Ifuu and Burai | CAPCOM trailer announcement (the Genma siblings) | not an achievement tier | Presented as a paired melee and ranged threat |
The honest caveat: more encounters certainly exist, including large poise Genma and the named demons listed in guide databases, but a page printing a complete roster within days of launch is guessing. The table above contains only citable encounters.
Bosses ranked by combat difficulty: the Carnage hierarchy
Players searching for a boss ranking need to know how the citable encounters stack up when the difficulty spikes on the second run. On the hardest difficulty, missed timing is punished far more harshly than on a first playthrough, which is the whole reason that run sits behind a completion gate. The ranking below is editorial, based on attack startup speed, parry window, and phase complexity, and it is clearly separated from the data table that follows.
S-Tier: apex duels and reaction walls
- Sasaki Ganryu: the featured rival duel, corrupted by void essence and wielding a long nodachi. His multi-hit thrust strings offer the tightest read in the game, and rolling early is actively punished by forward tracking. This is the definitive mechanical skill check.
- Shuten Doji: a high-poise Genma warlord. He demands relentless guard-breaking and deflection pressure, and his wide sweeping swings reward disciplined timing over panic dodging. You must break his armor with Break Issen (Helm Splitter) before meaningful damage opens up.
A-Tier: dual threats and arena hazard encounters
- Ifuu and Burai: the Genma siblings, confirmed in official trailer materials. Fighting both at once splits attention between close melee and ranged projectiles, forcing you to control spacing and deflect incoming fire before counter-attacking.
- The Byakue at Kiyomizu-dera Temple: the location-specific story encounter behind Serves You Right (62.8%). It relies on rapid aerial repositioning and a short stagger recovery window, which forces a quick commitment to Break Issen.
B-Tier: pattern fundamentals and execution checks
- Benkei: a massive polearm and shield fighter (Benkei: Out, but Not Down, 68.7%; Baited by Benkei, 51.7%). His heavy overhead windups give clear telegraphs, making him the ideal encounter for practicing single Issen timing and armor breaks.
- Dokyo: a sorcery and projectile opponent (Dokyo’s Fixation, 73.1%). Heavy ranged pressure is an execution check for projectile deflection (Pinch Hitter, 42.1%), testing whether you can send shots back to drain his barrier stamina.
Boss strategy and weakness matrix
| Encounter | Tier | Primary threat | Key counter strategy | Break Issen payoff |
|---|---|---|---|---|
| Sasaki Ganryu | S | Rapid thrusts and delayed void slashes | Stand ground, read the shoulder drop, counter with Issen | Head strike for a large posture collapse |
| Shuten Doji | S | Heavy sweeps and hyper-armor slams | Deflect sweeps, break armor via Break Issen | Shield and armor break opens the body |
| Ifuu and Burai | A | Dual pincer attacks from two angles | Separate the siblings, deflect ranged shots | Drop one sibling to remove the crossfire |
| The Byakue | A | Aerial dives and narrow stagger windows | Parry the dive impact, commit immediately to Break Issen | Limb stagger limits its mobility |
| Benkei | B | High-damage overhead slam | Bait the overhead (Baited by Benkei), step in to counter | Armor break destroys his guard |
| Dokyo | B | Barrier spells and tracking projectiles | Deflect projectiles (Pinch Hitter) to collapse the barrier | Barrier collapse leaves him helpless |
What the achievement data reveals: the mechanics ladder
Subjective tiers are one thing. Global achievement unlock rates give an objective read on which combat mechanics players actually master, and every rate below reflects the current Steam global stats.
| Rank | Mechanic | Achievement that proves it | Global rate | Why it matters for bosses |
|---|---|---|---|---|
| 1 (rarest) | Oni Awakening usage | Oni’s Oni, defeat 50 enemies in the Oni Awakened state | 19.0% | The state that compounds with the Bishamonten Sword |
| 2 | Chain Issen | Flow State, defeat 50 enemies with Chain Issen | 16.4% | Turns a single counter into a boss-ending sequence |
| 3 | Maxed charms and pouch | Charmed Life (all charms maxed) / Medical Marvel (all Hozuki Pouches maxed) | 12.5% / 15.9% | The only upgrades inherited on a second run |
| 4 | Basic Issen fluency | Brutalist, land 50 Issen attacks | 52.7% | About half of players reach 50 counters |
| 5 | Deflection and projectile control | Pinch Hitter, deflect 50 projectiles | 42.1% | Boss stamina is drained through clean reads |
| 6 | Breaking guard and armor | Helm Splitter, break 100 shields or armor pieces | 65.7% | The prerequisite for the stagger that opens Break Issen |
| 7 (most common) | Basic counter habit | Berserker, defeat 3 enemies with continuous Break Issen | 79.5% | Most players get here; it is the floor, not the ceiling |
How to read this ladder: the gap between rank 7 (79.5%) and rank 4 (52.7%) is where casual players stop. The gap between rank 4 and rank 2 (16.4%) is where competent players stop. Hard-mode bosses expect you to operate in ranks 1 to 3, which is exactly why the endgame achievements cluster low.
The confirmed combat loop for every boss
- Read the attack. Every boss telegraph is a decision point; the mistake is rolling early.
- Parry or perfect-dodge. Clean timing converts an incoming attack into your turn.
- Punish with Issen. This is your largest single damage chunk and it releases more souls. Brutalist exists because landing 50 Issen hits is not automatic.
- Drain stamina with deflections. Keep answering until the bar breaks. Pinch Hitter (deflect 50 projectiles, 42.1%) and Coming Through! (break guard 50 times, 62.6%) are the habits this step is built on.
- Finish with Break Issen. On the stagger you choose a body part; the payoffs differ, and Helm Splitter (65.7%) tracks shields and armor pieces you break.
- Absorb between exchanges. Yellow souls heal, blue souls charge Oni Power for armaments, red souls fund upgrades, and absorption capacity is itself a progression axis (Get This Thing Off Me needs 30 or more souls at once, 90.1%).
Systems you should have before the endgame bosses
- Chain Issen, the single biggest quality jump. Flow State requires 50 chain kills and only 16.4% of players have it, which is why late fights feel like walls to most players.
- Oni Awakening, a confirmed transformation state shown in CAPCOM’s trailer materials. Oni’s Oni (50 kills in the state, 19.0%) is among the rarest combat achievements, and the state is what the endgame weapon explicitly compounds with.
- Blazing State. Burning Blade (defeat 50 foes in the Blazing State, 64.0%) confirms the elemental burn state, and Genma Griller (set three enemies ablaze at once, 12.6%) tracks the crowded version.
- Reflex Combos and Grab Reversals. Stop Motion (50 Reflex Combos, 48.4%) and Untouchable (50 Grab Reversals, 62.8%) confirm both systems as core defensive tools.
- Oni Armaments. Oni Armory (acquire all, 43.2%) and Wielder of Oni Armaments (100 kills with them, 27.3%) track the full armament system.
- Maxed charms and the Hozuki Pouch. These are the only upgrades that carry into a second run, and the reason the harder run is survivable at all.
The hardest difficulty, and why the endgame sword matters
Unlock: the hardest difficulty unlocks after your first completion, so the endgame difficulty is played on a second run. Press and community coverage refer to it as Carnage.
The reward: clearing it awards the Bishamonten Sword (毘沙門剣), whose documented effect is that Issen becomes easier to trigger, with a further reduction while you are in Oni Awakening. It is the only weapon described as carrying a combat bonus rather than a flat stat line, which is the right reward shape for a difficulty built on tighter timing.
The second-run rule you must plan around: equipment and character upgrades do not carry over, but charms and the Hozuki Pouch do. The endgame run therefore starts with your defensive and utility upgrades intact and your raw equipment reset. Budget red souls accordingly: persistent tracks first, per-run equipment second.
Achievement context: this is the cluster holding Glutton for Punishment (9.8%), True Onimusha (10.7%) and Peerless (7.0%). Compare that with first-completion achievements in the high sixties and seventies, and the conclusion is clear: players do finish the game, they largely do not do the second run.
What is not verified on this page
- A complete boss roster. CAPCOM has not published one.
- Per-boss damage multipliers, HP values, and kill-time benchmarks. Not published; any table claiming second-precision numbers is unsourced.
- Exact Issen frame windows. CAPCOM has not published them. The Issen timing guide covers confirmed mechanics and provides a practice simulator instead of invented numbers.
- A numeric difficulty ranking of named bosses. The tiers above are editorial; the achievement rates do not mathematically order individual fights.
- The hidden endgame achievement conditions. Their descriptions are not public; see the achievements guide for what the data does and does not show.
Related guides
- Achievements guide: all 52 ranked by rarity - which endgame goals actually gate the Platinum
- Weapons guide: Bishamonten Sword and carryover rules - what to spend red souls on before the second run
- Issen parry and timing guide - the counter this entire loop is built on
- Walkthrough and chapter guide - where each named encounter sits in the campaign
Frequently Asked Questions
Q: Which bosses are confirmed in Onimusha: Way of the Sword?
Achievement data names Benkei, Dokyo, and the Byakue at Kiyomizu-dera Temple, and CAPCOM's own demo and trailer materials confirm Sasaki Ganryu as a featured duel plus the Genma siblings Ifuu and Burai. CAPCOM has not published a complete roster, so this guide lists citable encounters rather than claiming a full list.
Q: How do you unlock the hardest difficulty?
By finishing the story once. That means the endgame fights are played on a second run, which is also why the completion achievements tied to them sit in the low double digits.
Q: What is the best strategy against bosses?
Read each attack and answer with a clean parry or perfect dodge, punish with Issen for your largest damage chunk, keep draining stamina with deflections, then commit to Break Issen the moment the boss staggers. Chain Issen and later Oni Awakening are the upgrades that change how fast this loop closes.
Q: Do bosses have weak points?
Yes, via Break Issen. Once stamina is depleted and the boss staggers you choose which body part to strike, and different parts yield different payoffs. The game tracks this: Helm Splitter requires breaking 100 shields or pieces of enemy armor, and 65.7% of players have earned it.
Q: Which combat mechanics should I have unlocked before late-game bosses?
Chain Issen above all, since only 16.4% of players ever land 50 chain kills, and Oni Awakening, which 19.0% use for 50 kills. Both are the difference between a loop that closes in one exchange and one that drags on.
Q: Is the hardest difficulty required for the Platinum?
The endgame achievements are tied to the second run and the hardest difficulty, so yes in practice. Peerless sits at 7.0%, Glutton for Punishment at 9.8% and True Onimusha at 10.7%, and all three belong to that cluster.